User Guide
Parsec user guide: installation, getting started, organization administration, customer portal and security best practices.
Who is this guide for?
Parsec is a robust security solution that lets you secure, manage and share your data confidentially and with integrity, all within an ergonomic and easy-to-use tool.
This guide will walk you step by step through getting your organization up and running, inviting your collaborators and managing access to your data.
Users
The people and teams who use Parsec daily to access, share and protect their sensitive data. This guide will give them a clear understanding of the features and best practices for using Parsec securely.
Organization administrators
The people responsible for rolling out the tool, inviting collaborators into the organization and monitoring proper use of Parsec.
IT security professionals such as the DPO
Those responsible for protecting data against threats and vulnerabilities, who will find essential information here for integrating Parsec into their security strategies.
System administrators (CISO, CIO…)
The people managing IT infrastructure and/or responsible for installing, configuring and maintaining Parsec within their organization.
Overview
Parsec lets you easily share your data with full confidentiality. It provides the cryptographic guarantee that shared data is neither read nor modified by an unauthorized third party.
Parsec considerably widens the possibilities for secure exchanges in an internal and external collaboration environment.
Why Parsec
- Solution certified by ANSSI on a security target covering confidentiality, integrity, logging, non-repudiation, revocation and authenticity.
- Asynchronous solution allowing offline work or work with an intermittent network connection.
- The synchronization server has no access to sensitive data in clear text.
- End-to-end security, with unique, personal encryption and signing keys.
- Support for Public Key Infrastructures (PKI) to establish trust between users.
- Ergonomic and easy to use.
- Open source
Installation & updates
Parsec is available on desktop as a native application, or directly via the web. You can use Parsec regardless of your device.
- Desktop application (macOS, Windows and Linux only): download
- Web application: app.parsec.cloud
Tip: check your system requirements before installing.
Updates
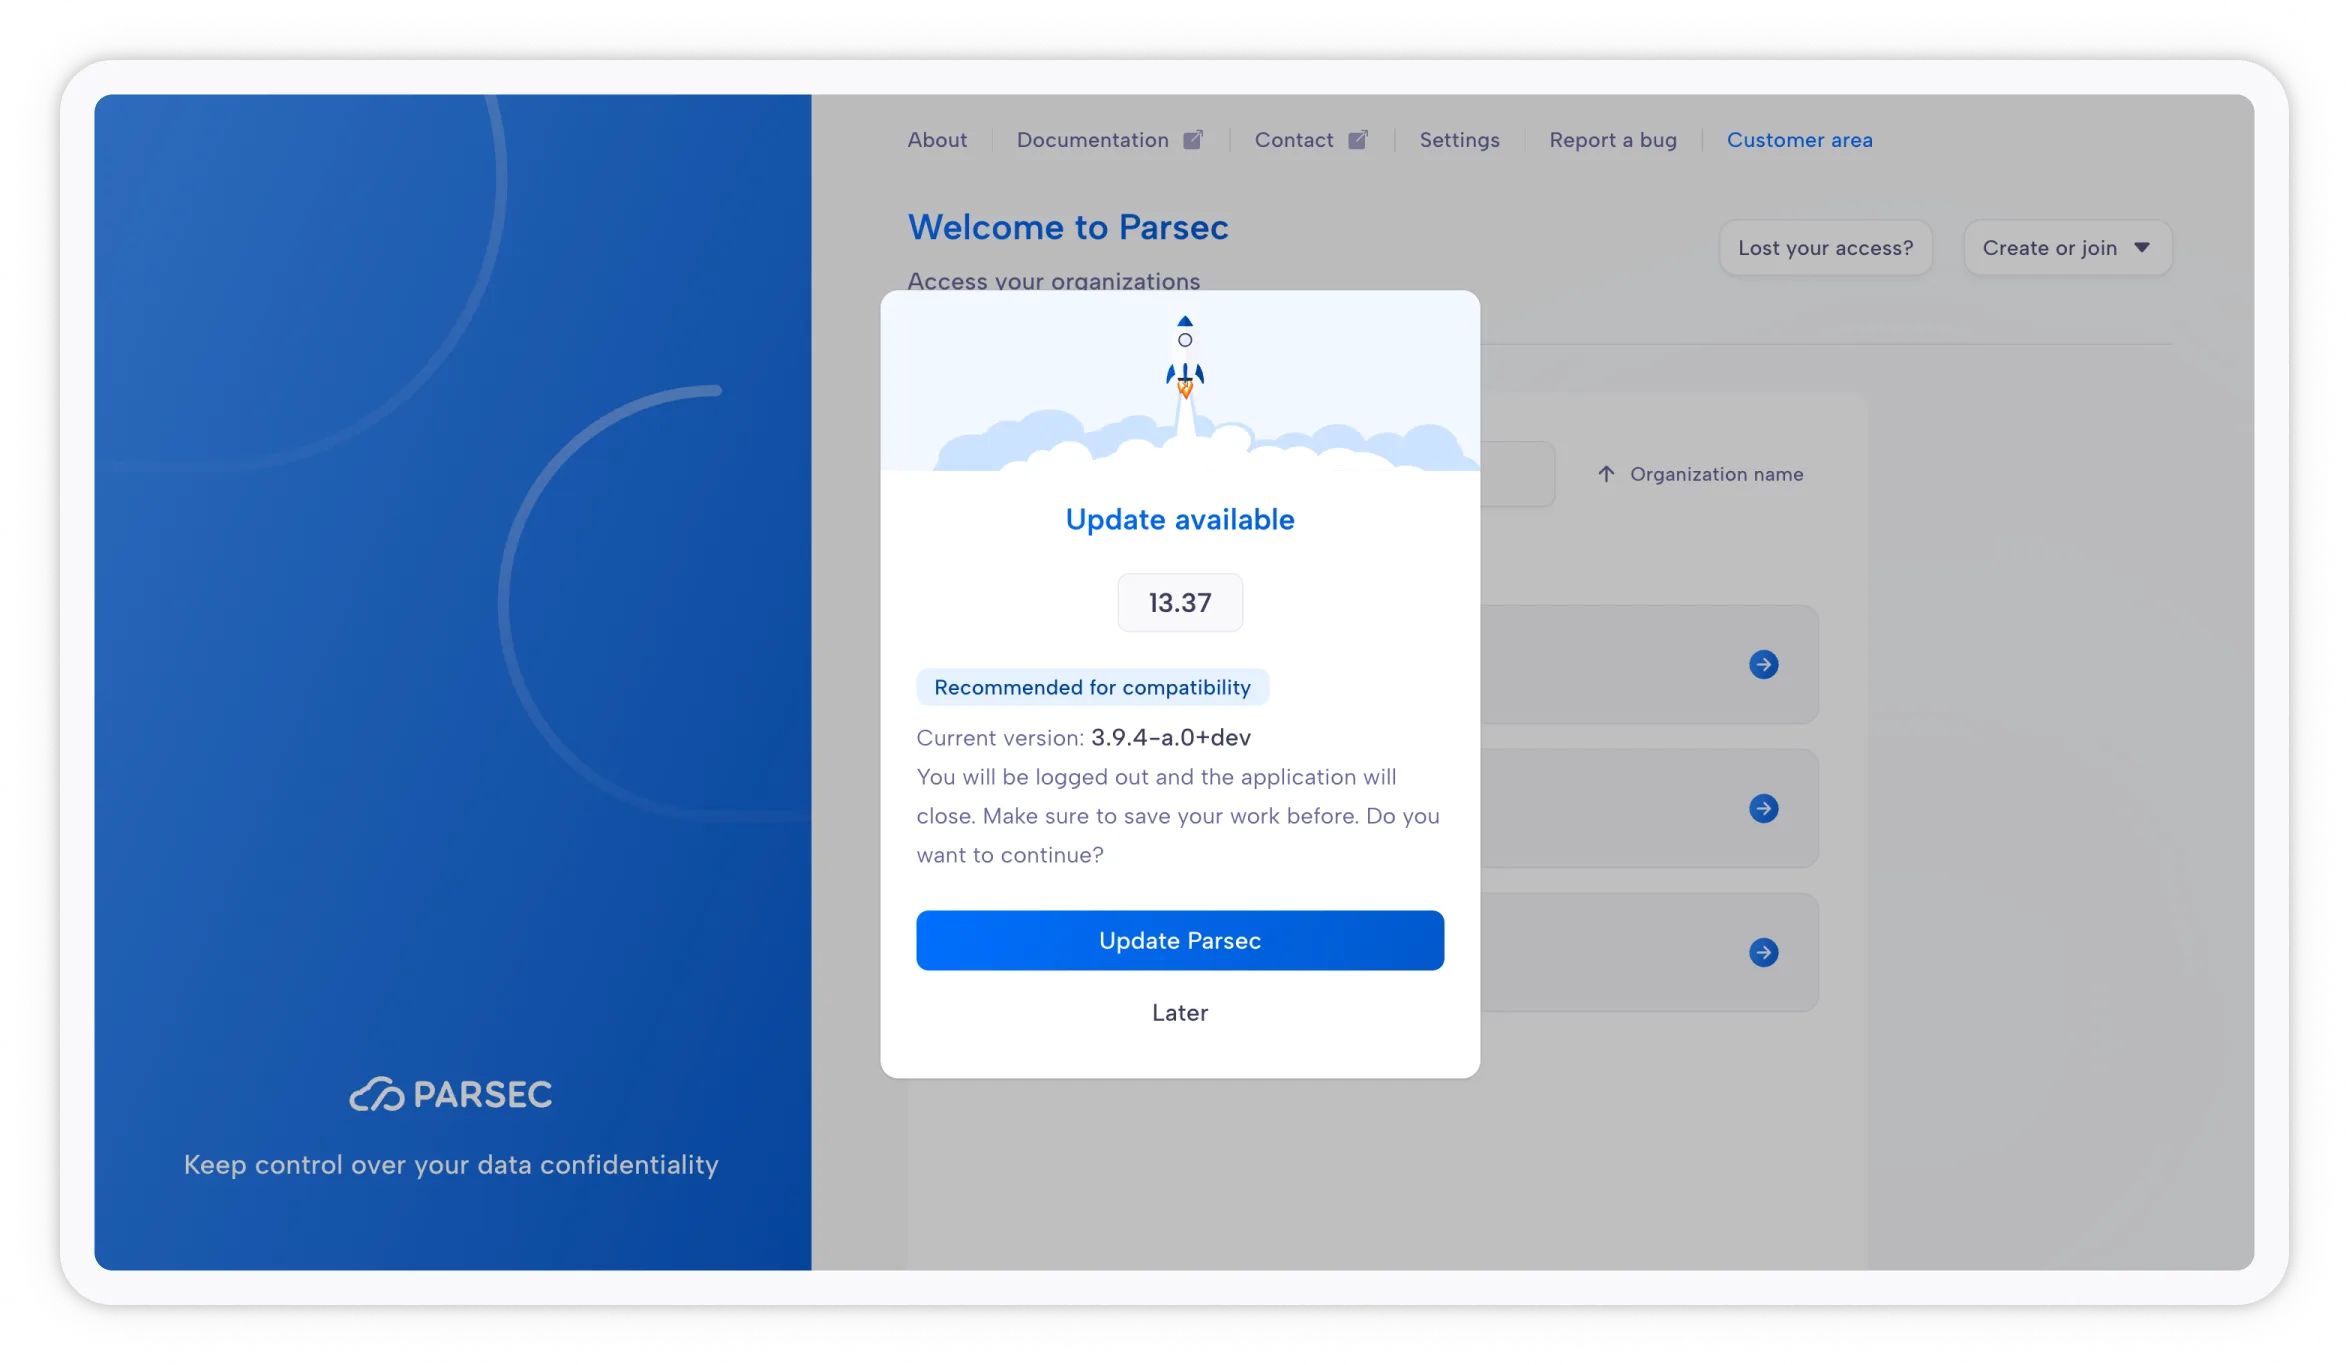
We recommend updating the application whenever you see a message telling you an update is available.
- Updates are installed automatically when the application starts.
- While the application is in use, a message appears in-app. Simply click the message to update the application.
Getting started with Parsec
Join an organization
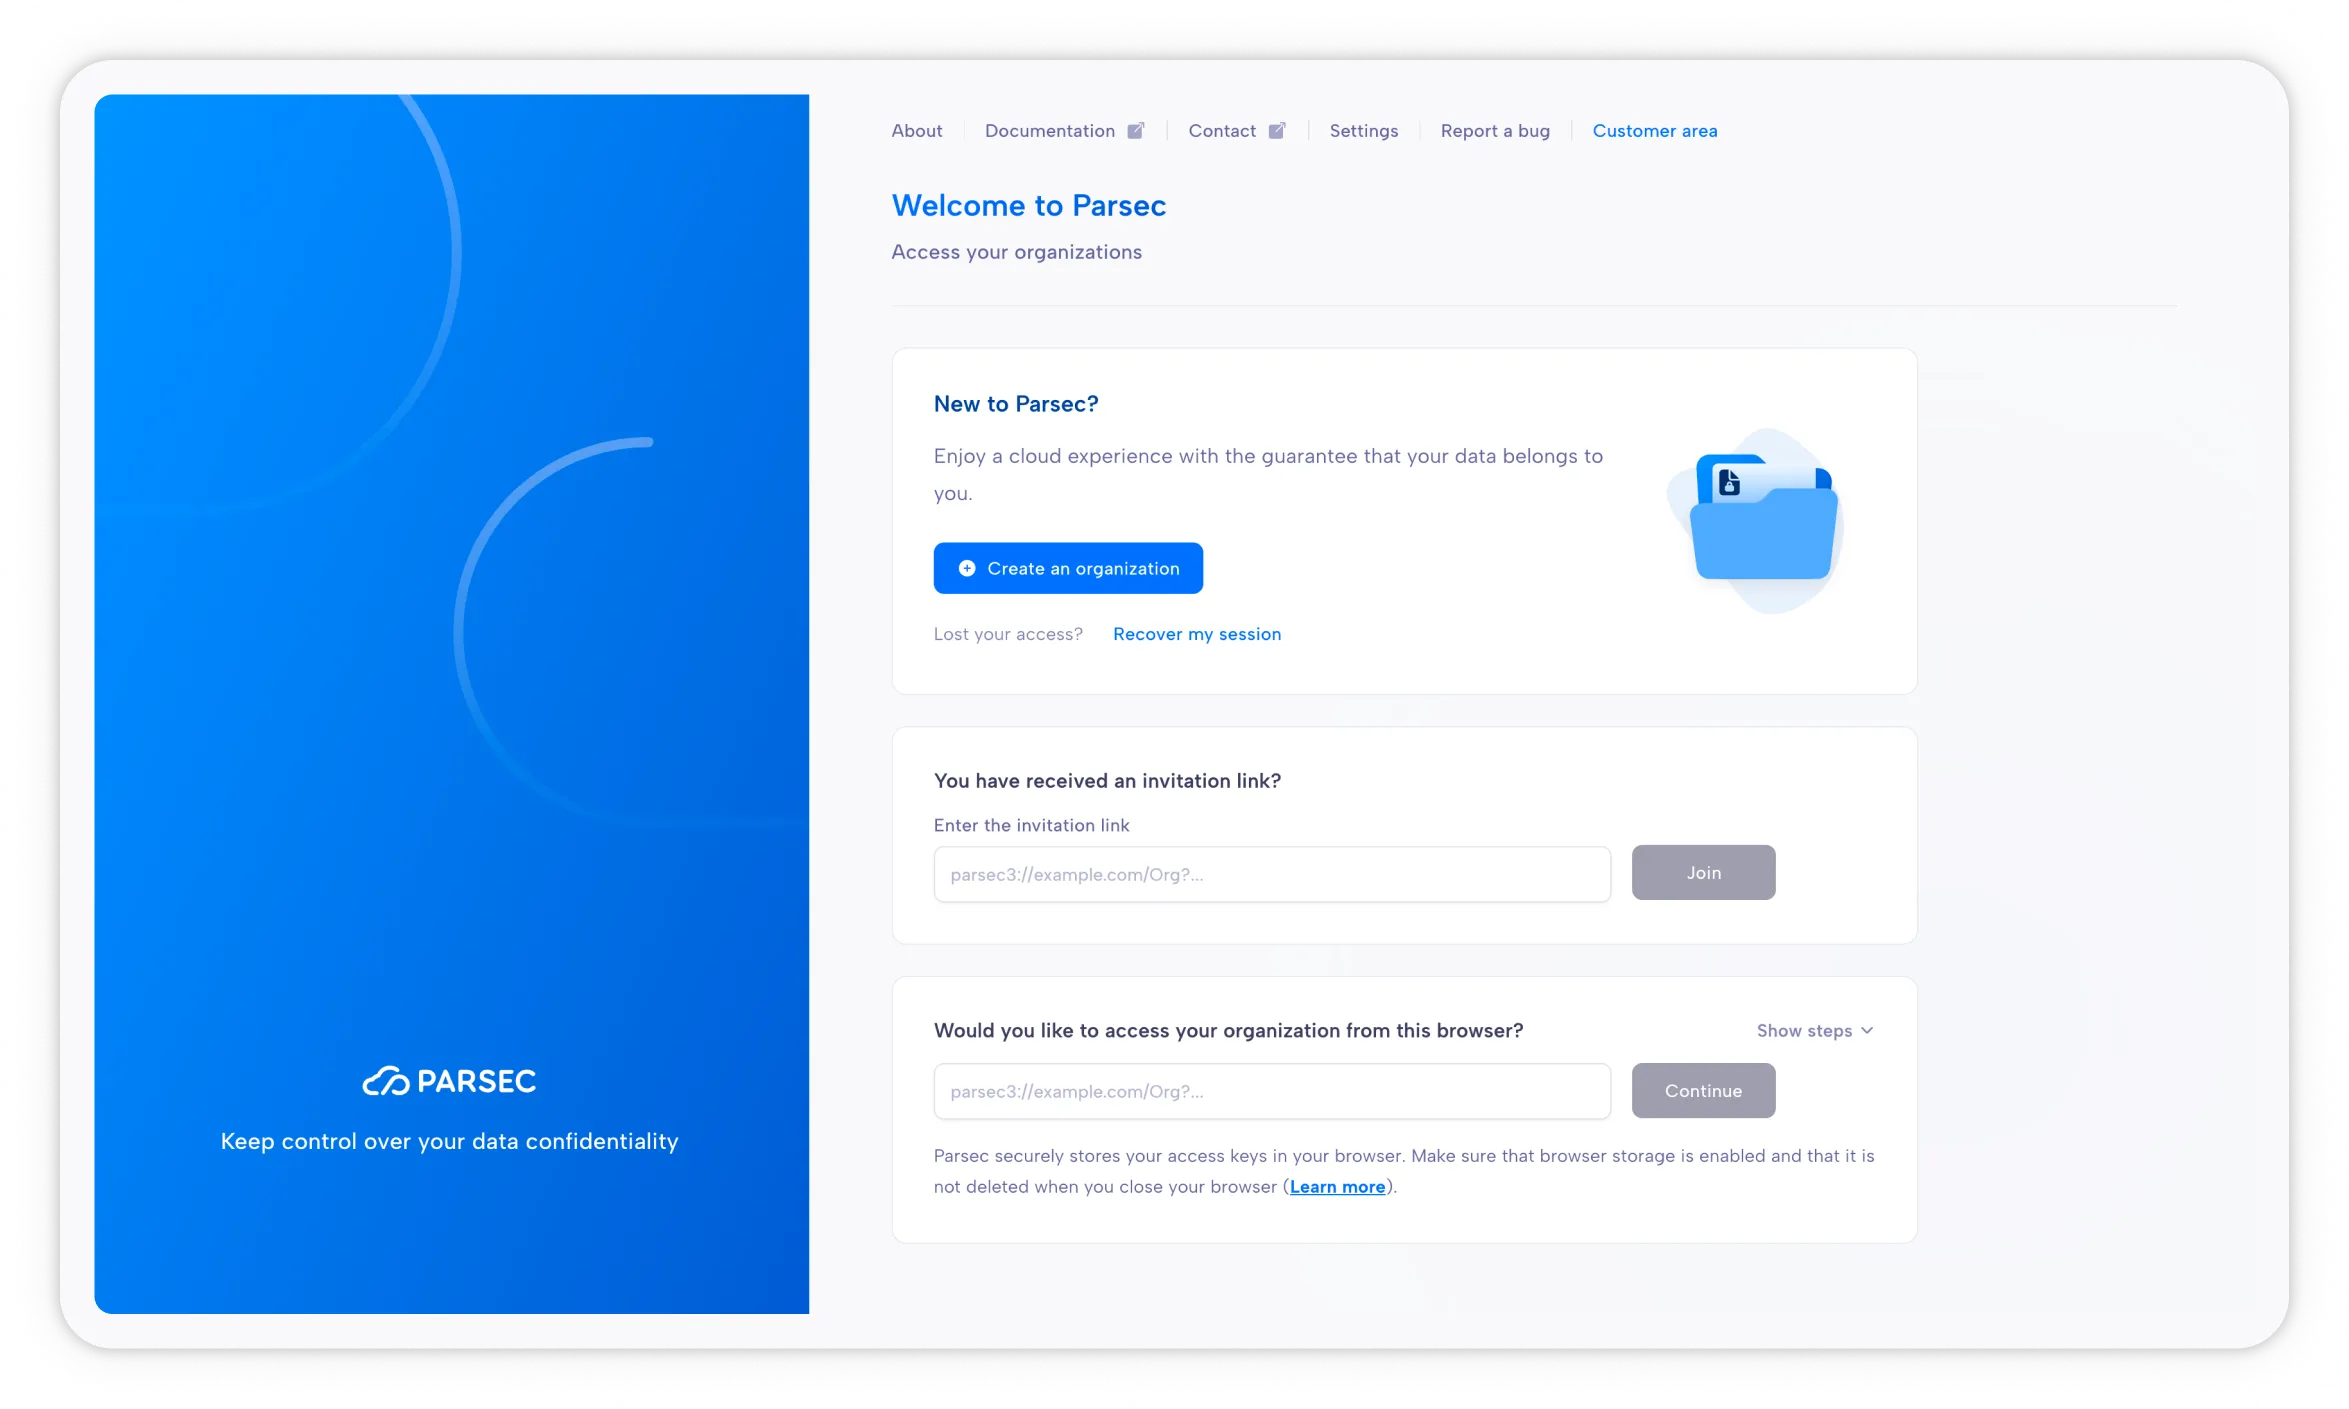
Once the application is open (desktop or web), you’ll be able to join the organization. There are two ways to do this:
- Click directly on the link in the email: “Join the organization”.
- Copy/paste the link starting with https://app.parsec.cloud… into the “You received an invitation link” field.
Invitation process
You’ll need to complete a code exchange. This ensures confidentiality between you and the person who invited you. Now click on the code provided by the administrator.
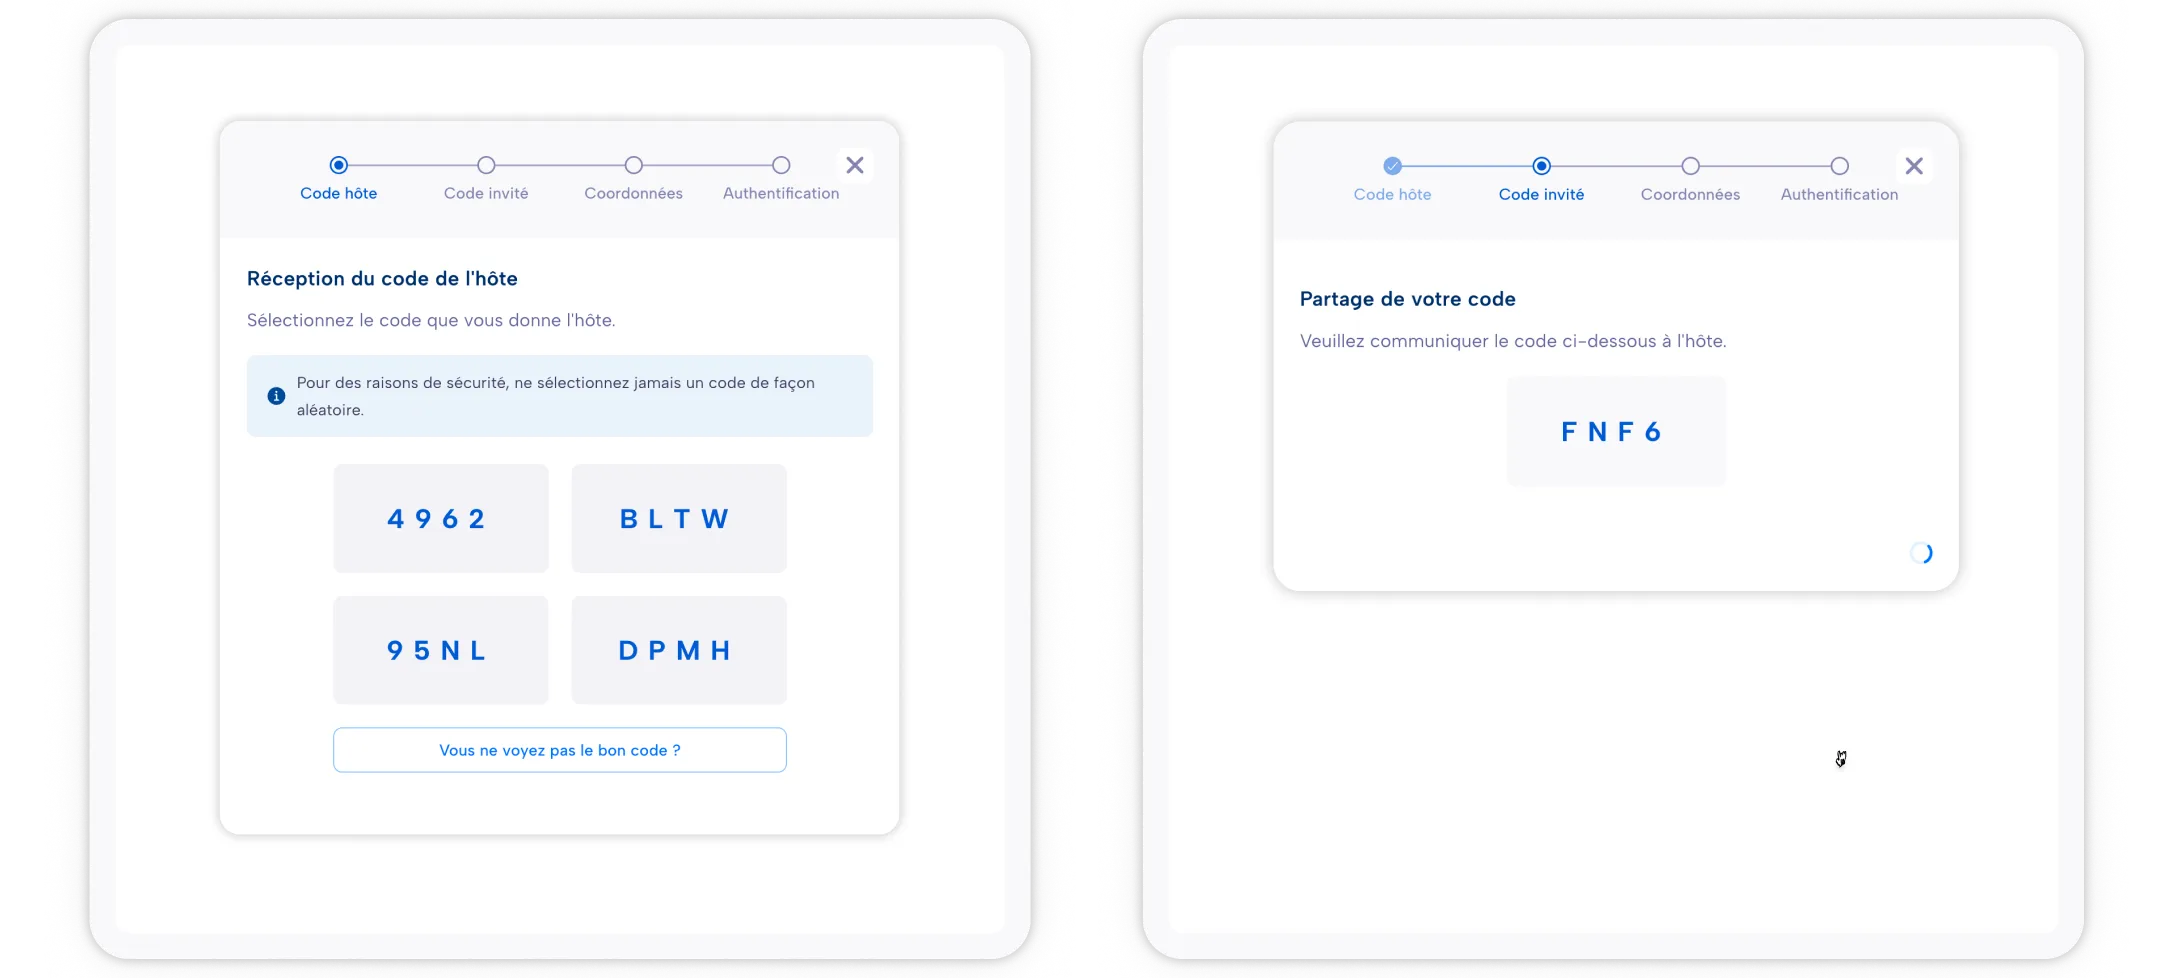
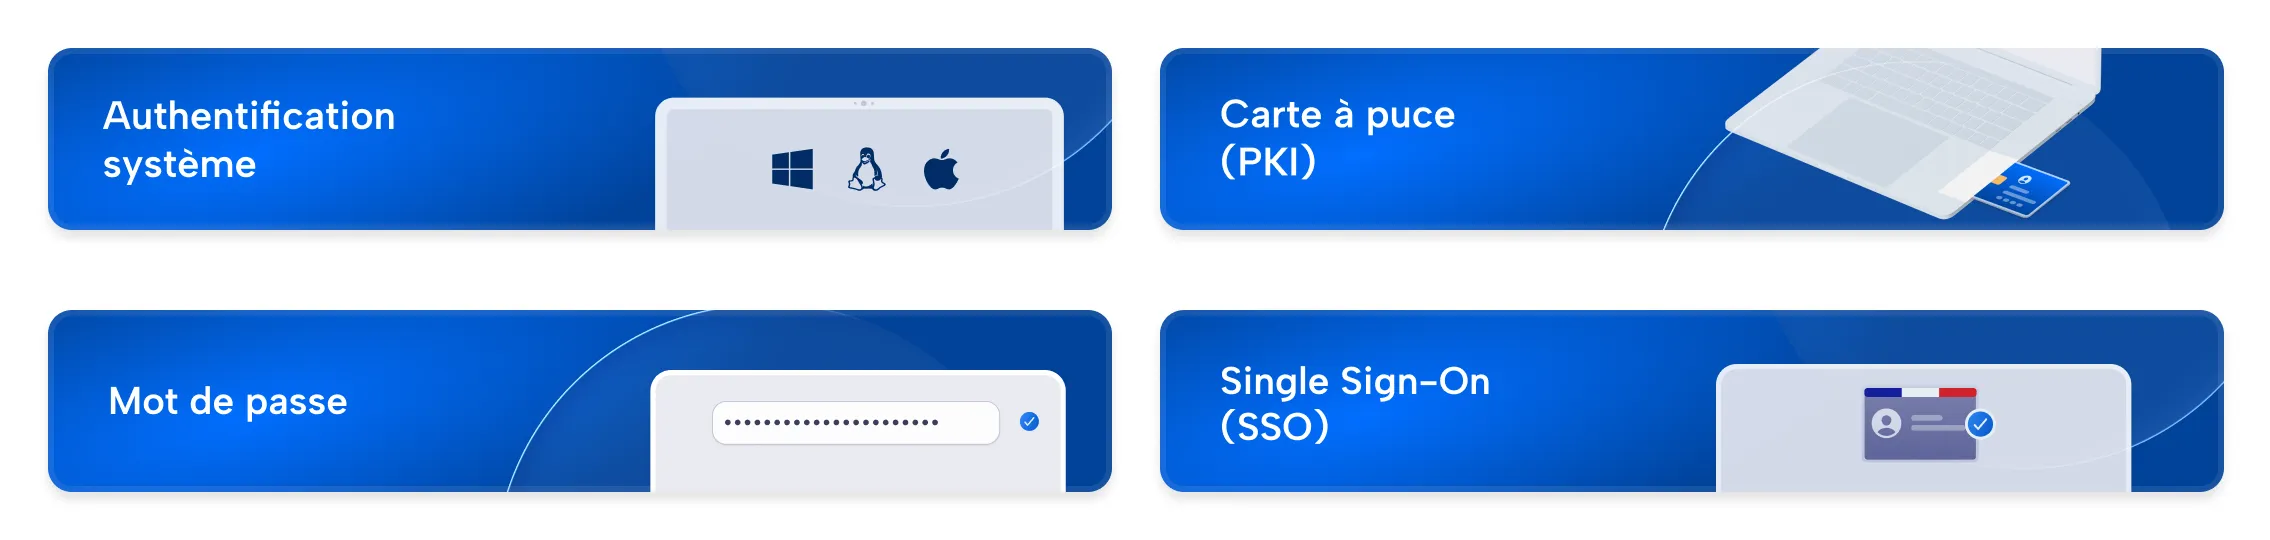
Enter your details and choose the authentication method you want (this can be changed at any time in your profile):
- Password
- Device authentication (the simplest option)
- PKI card (if your organization allows it)
- SSO (if your organization allows it)
Interface overview
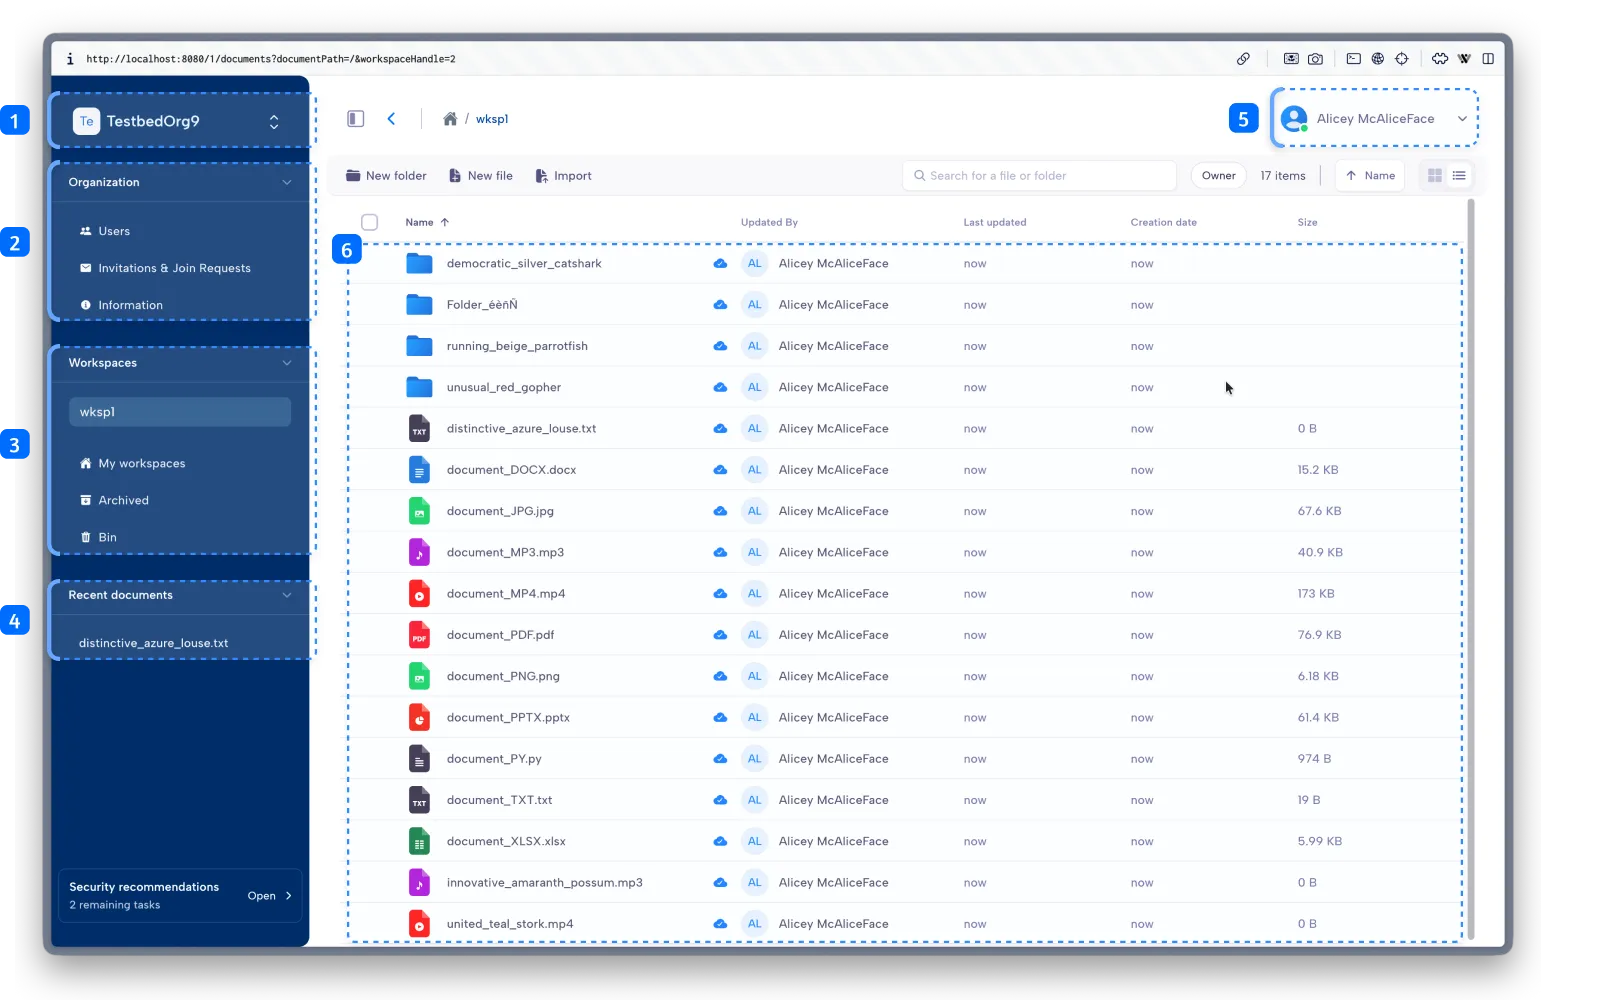
- Switch organization without signing out
- Access information (if your permissions allow) about the organization, including users and global data (configuration, etc.)
- Find shared workspaces (only workspaces shared with you). If you were invited as an external member, you won’t be able to create new workspaces.
- View your recent documents — When you open a document in Parsec, it will automatically be added to this section.
- Edit your profile, including your authentication method and devices.
- Workspaces and documents — find the workspaces and their associated documents by opening the workspace you want.
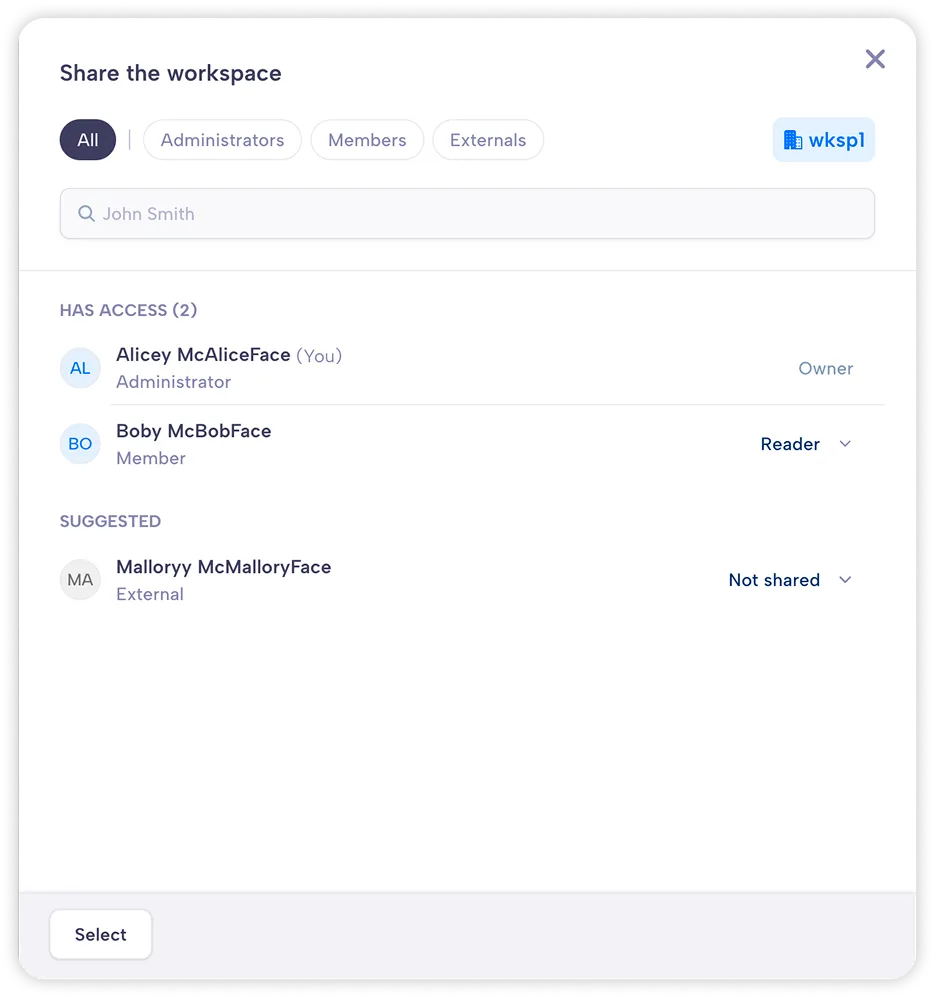
Share a workspace
- Go to the home screen (accessible via the “house” icon).
- Click the sharing icon or the ”•••” icon, then “Sharing and roles”.
- Search for the person you want to share the workspace with and set their role (their permissions).
Sign in with new devices
On Parsec, each device has its own unique authentication, meaning every device is unique in order to ensure stronger security. To start adding a new device, both devices will need to be connected to the internet with the application open.
To add a new device:
- From your existing device, go to your profile (via the top-right menu), then “My profile”.
- In the “My devices” section, click “Add”.
- Send the link to your second device (by email, instant messaging, etc.).
- On the invited device, copy this link and paste it into “Join an organization”.
- You’ll complete a code exchange between your devices.
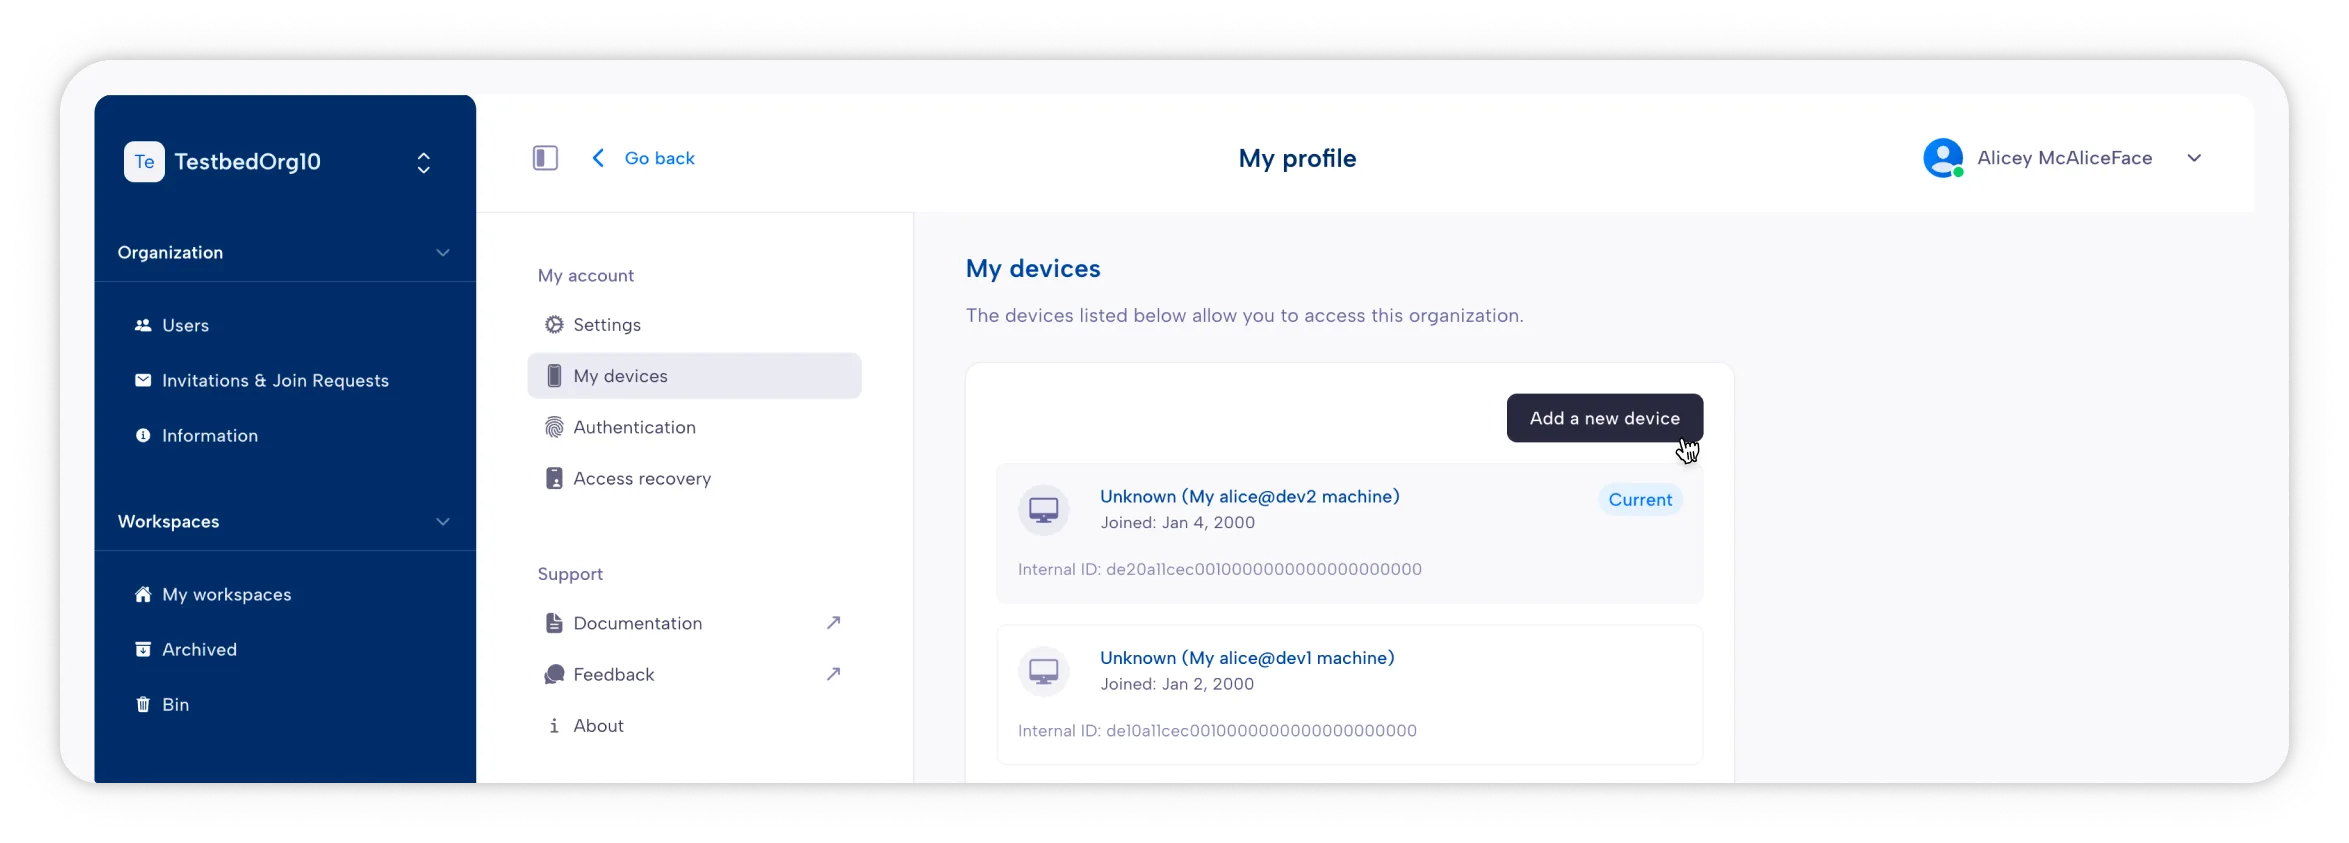
That’s it — you can now sign in with your new device!
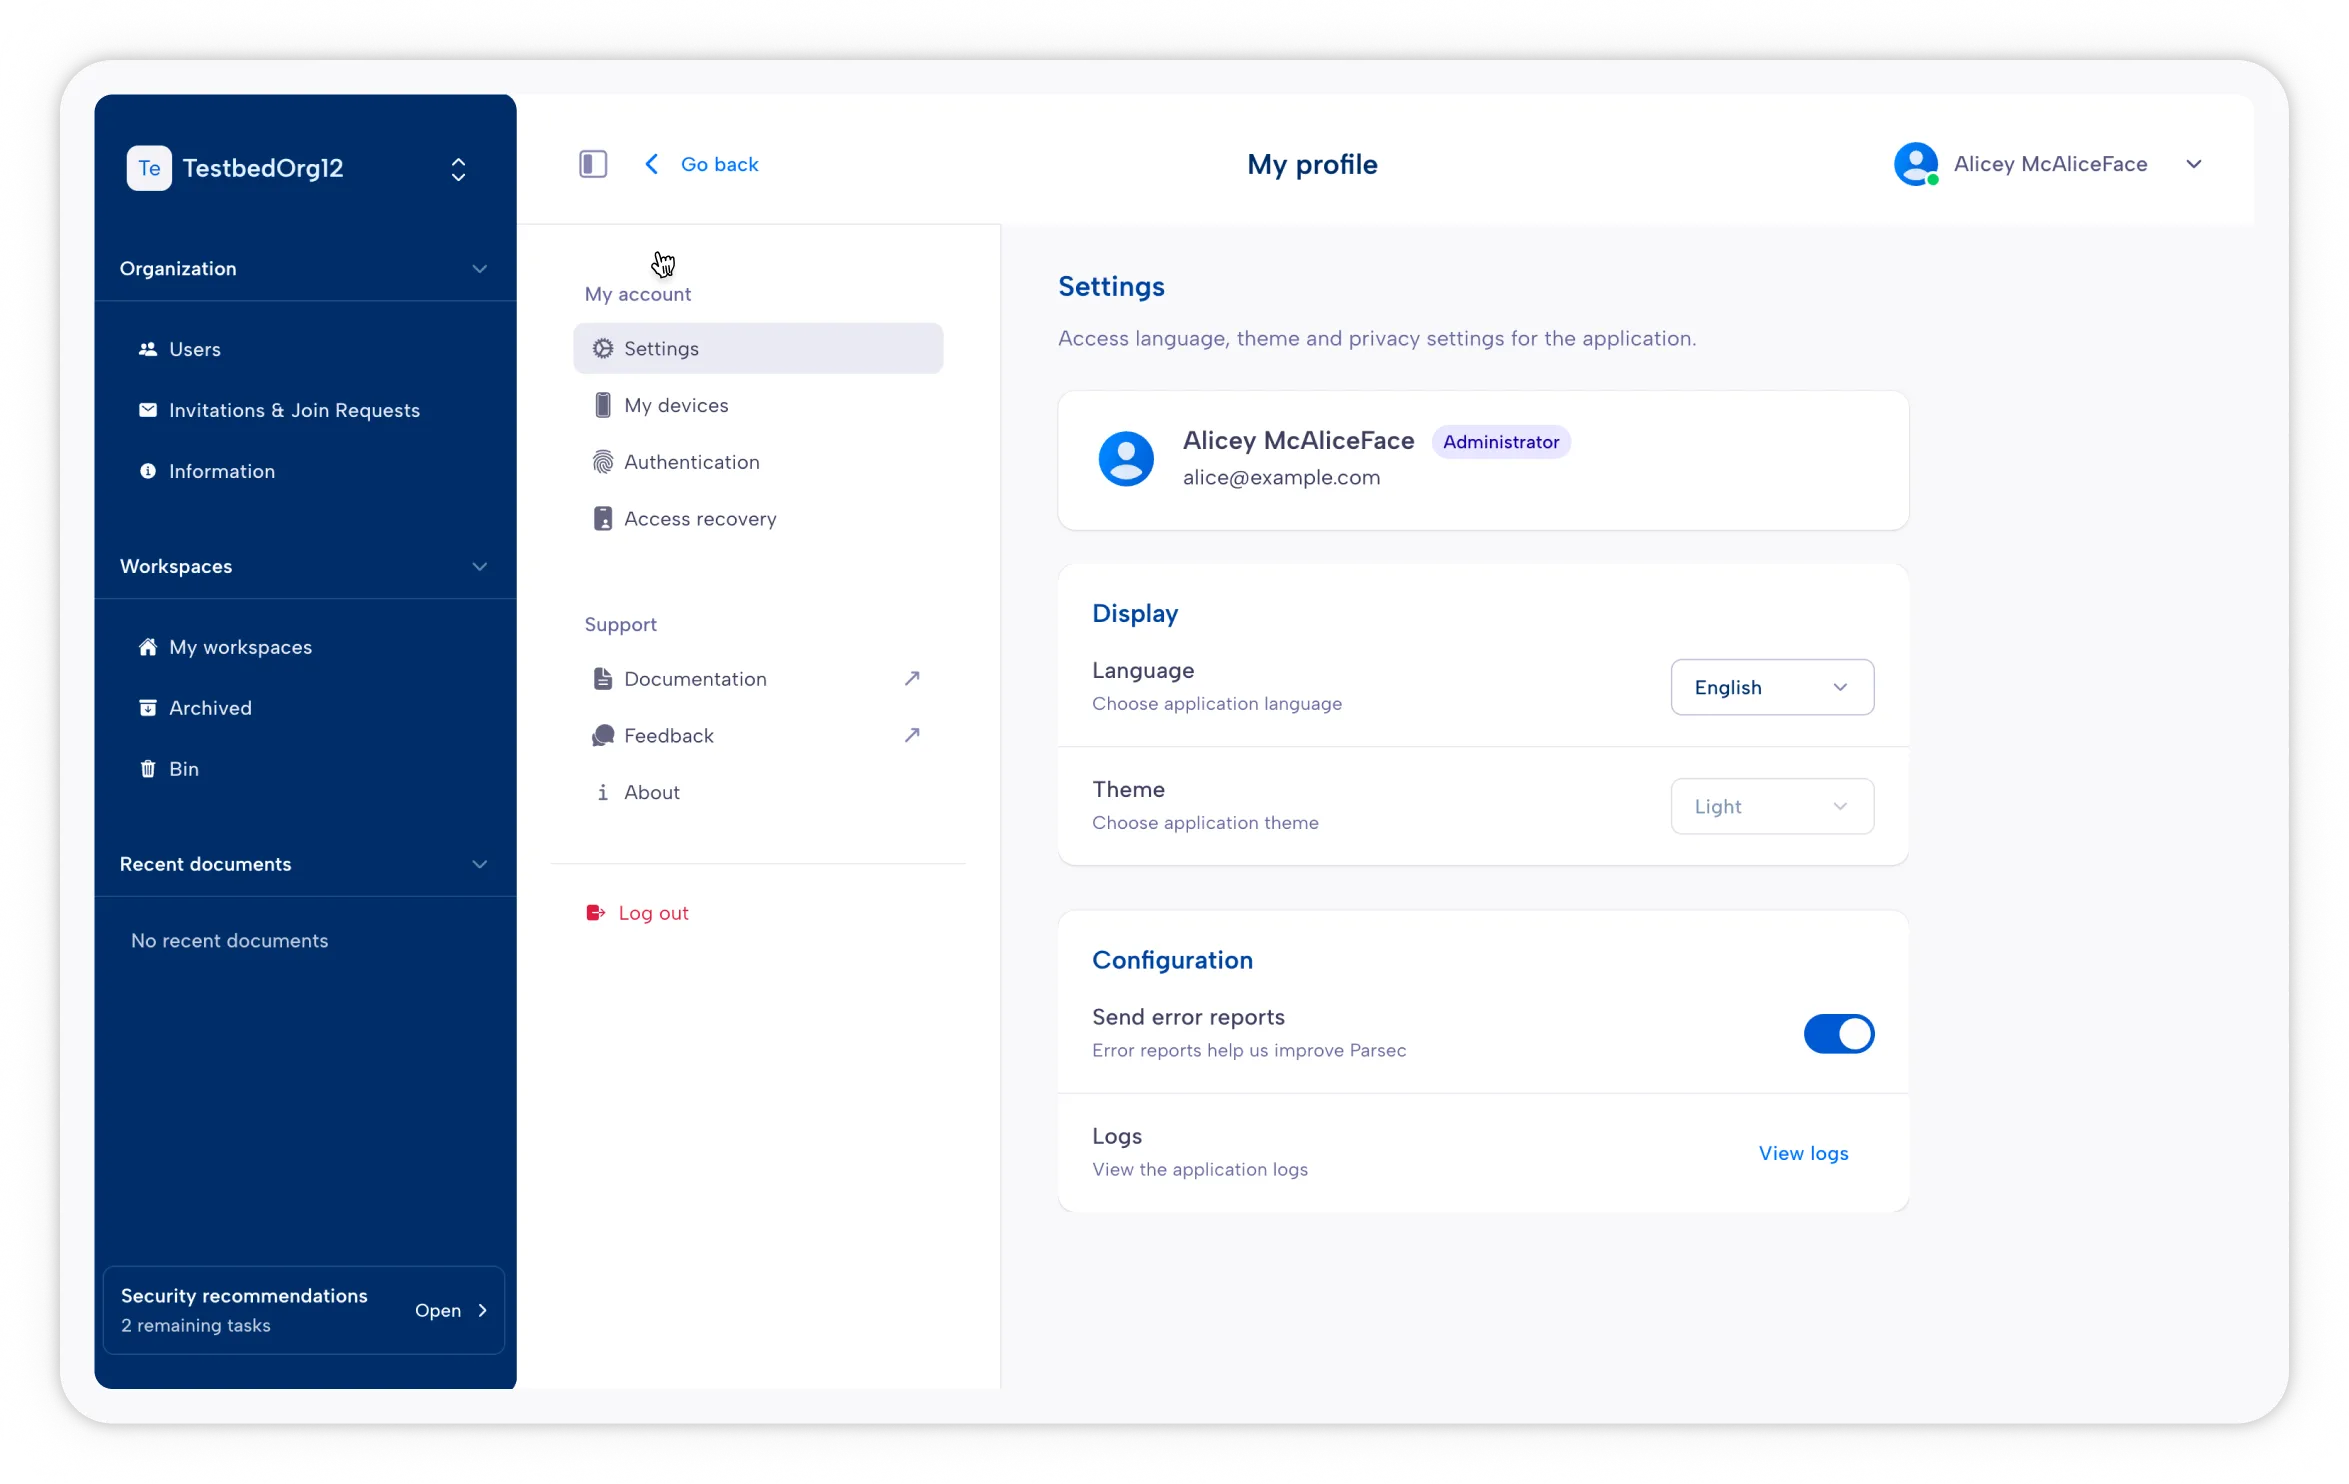
Access your settings
In the drop-down menu at the top right, you’ll find “Settings”, which lets you manage language, theme, etc.
Organization administration
⚠️ Prerequisites:
- Have subscribed to a plan via our pricing page
- Be registered as a customer
Manage your organization
From the sidebar you’ll be able to:
- Manage the organization’s users (add, remove, change profiles, etc.)
- Manage sent and received invitations (the required process for adding people via email invitations)
- View general information (whether external members are allowed, the organization’s address, etc.)
Invite a new member
Sending the invitation
Go to the “Users” section, then, in the actions menu, click “Invite a user”. You can also do this from the “Invitations & Requests” tab.
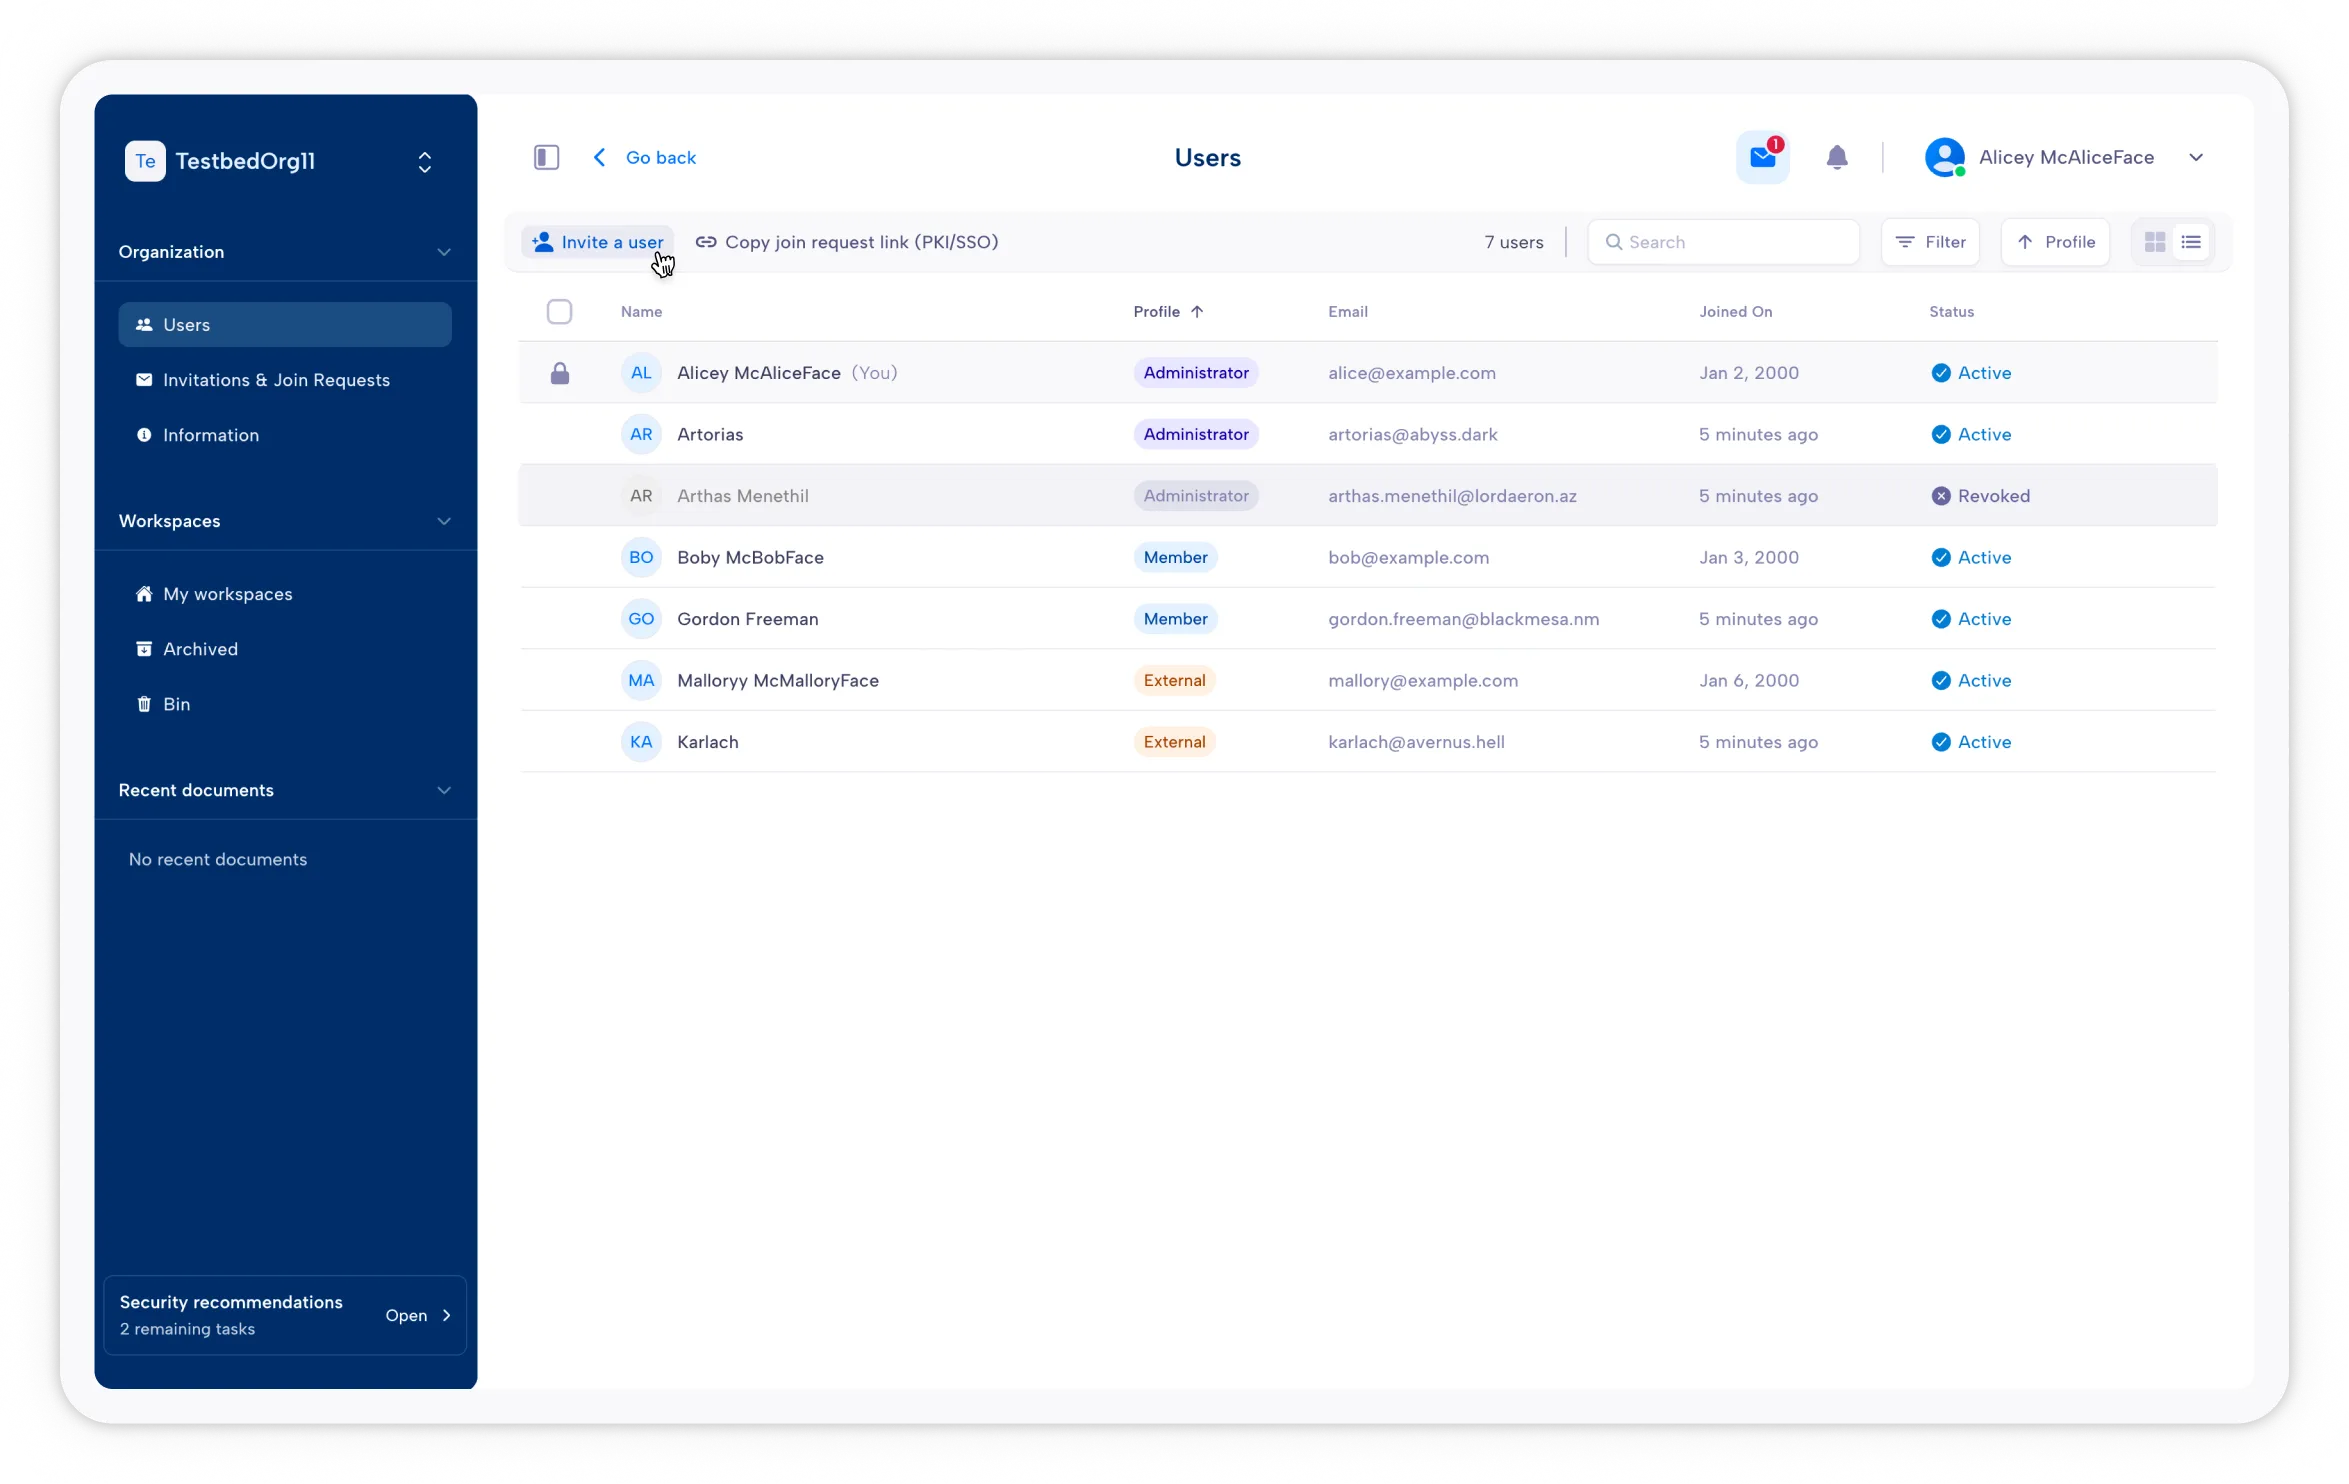
Once the email address is entered, the invitation is sent by email to the recipient. You can easily find your requests in the “Invitations and requests” tab: it shows you the invitations you’ve sent that are pending validation.
Why does an invitation need to be validated? An invitation creates a secure link between you and the invitee. To validate this operation, the Parsec application must be open for both people.
Welcoming the new member
| You (administrator) | Invitee |
|---|---|
| From the invitations tab, click the “Welcome” button on the invited person’s row | In the email received, click “Join the organization” |
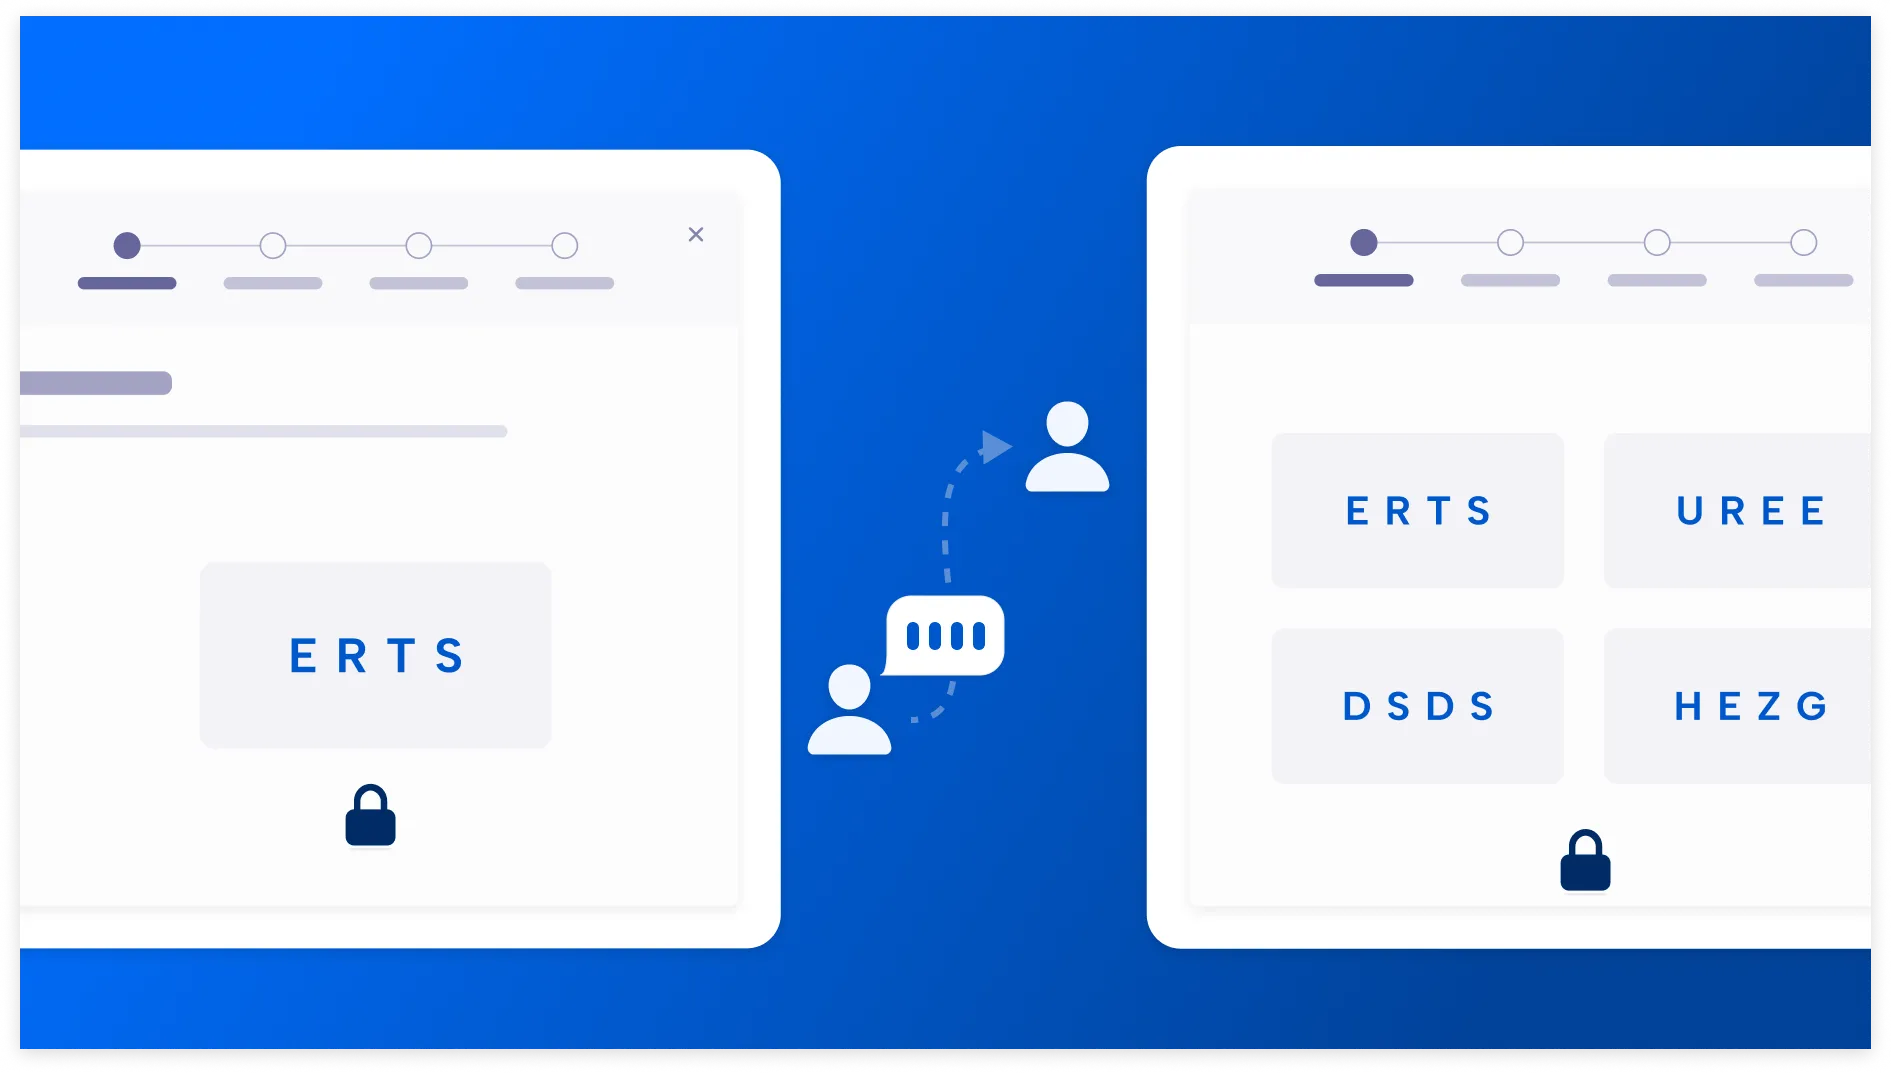
You’ll need to complete a code exchange. This ensures confidentiality between you and the invited person. Now click on the code provided by the invitee.
Choosing the profile
You’ll need to choose the person’s profile. The profile defines a person’s permissions within the organization. Here’s a summary of the permissions for each profile:
| Task | Administrator | Member | External |
|---|---|---|---|
| Create workspaces | ✅ | ✅ | 🚫 |
| Share workspaces | ✅ | ✅ | 🚫 |
| Collaborate in workspaces | ✅ | ✅ | ✅ |
| See organization members’ names/emails | ✅ | ✅ | 🚫 |
| Add/remove users from the organization | ✅ | 🚫 | 🚫 |
| Copy one member’s permissions to another | ✅ | ✅ | 🚫 |
Note: an External profile cannot be changed.
Using the customer portal
Who this is for:
- Anyone wishing to subscribe to a plan via our pricing page
- Registered customers and organization administrators
Subscribe to a plan
Note: If you’ve already subscribed to a Parsec plan, you can skip directly to Getting started with the customer portal.
- Go to our pricing page.
- Choose the plan you need (monthly subscription or on quotation).
- Follow the sign-up process after verifying your email address.
- Once you reach the download page, install the application for your platform (Windows, macOS or Linux).
- Open the Parsec application.
- You can easily access the customer portal via the top-right button.
Getting started with the customer portal
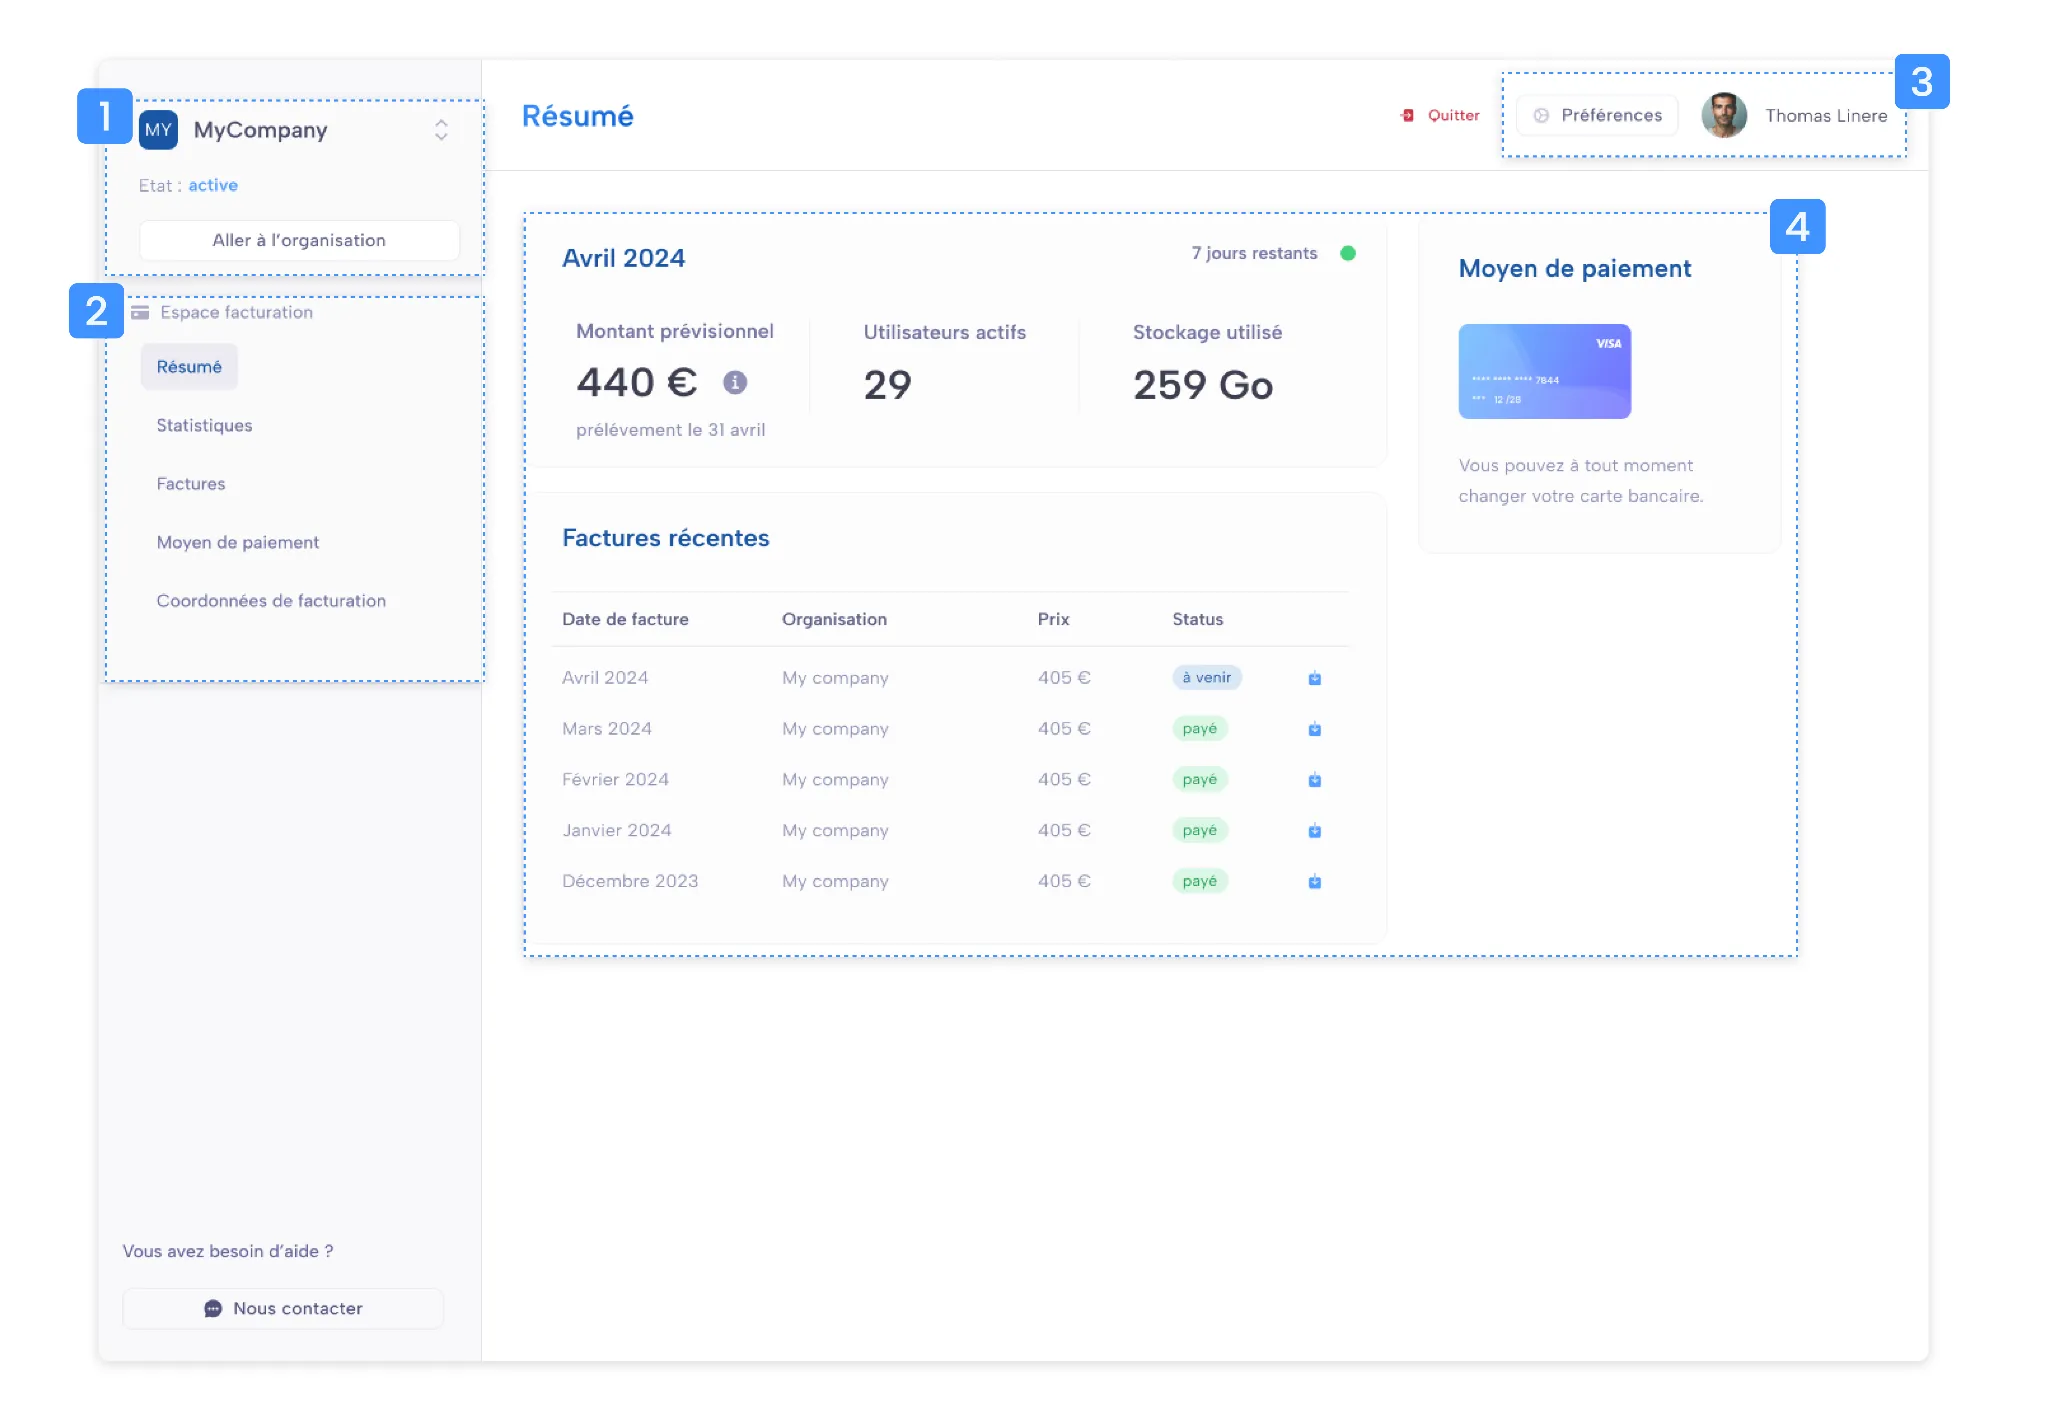
Parsec Client lets you efficiently manage your organizations, view members and storage used, manage your payment method and view your invoices.
- Switch and easily access your organization — you also get information on its status (active or frozen).
- Access the different sections of your portal (overview, statistics, invoices, payment method and billing details).
- Edit your profile preferences (personal and professional information as well as your authentication method).
- Page content — find the information for the selected section.
Payment
Payment methods
Parsec offers two payment methods:
- Credit card → lets you independently create your organization and change your card at any time (no commitment).
- Bank transfer → works as a contract with a fixed-term commitment between the organization’s payer and our sales team.
The payment method is determined by your choice when selecting a plan.
Cancelling a subscription
Credit card payment
You can cancel a subscription at any time in the “Payment method” section.
Bank transfer payment
For custom orders, you’re committed for a fixed period (see the details in your contract). You cannot cancel a subscription before that period has ended.
A contract is not automatically renewed.
Technical support
For any support request, please contact us at: support@parsec.cloud
Bug reports
If you encounter a bug or issue, please provide the following information:
- Parsec version
- Shown in the top left of the home screen by clicking the “i”
- as well as in the profile menu (top left)
- Platform: Linux, macOS, Windows
- Description of the issue, with the steps to reproduce it
- Any other information that would help us understand the issue (error message, screenshot, etc.)
Feature requests
Missing a feature in Parsec? To help us better address your needs, please contact us with the following information:
- Description of your use case and the goal you want to achieve
- Why this feature matters to you and how you’d use it
- Have you considered any alternative solutions or workarounds?
Security and privacy
- Security best practices: recommendations for strengthening security.
- Privacy policy: information on how the software collects and uses data.
Security best practices
To keep your data secure, we recommend following these best practices:
- Use a strong password: choose complex, unique passwords for each user and device.
- Back up your private keys regularly: private keys are essential for accessing your data. It’s crucial to back them up securely.
- Register multiple devices: to prevent data loss in case a device is lost or stolen, it’s advisable to register multiple devices.
- Perform regular security checks: regularly review access and changes made to workspaces to detect any suspicious activity.
Privacy policy
Parsec takes pride in protecting the confidentiality of your data. Here’s how we handle the collection and use of information:
- End-to-end encryption: all data and metadata are encrypted client-side, meaning only authorized people can read them.
- Minimal data collection: Parsec only collects the information necessary to use the service, such as email addresses for invitations.
- No access to your data: Parsec, even as a service provider, has no ability to read your data, since it’s encrypted before being sent to the servers.
- Transparency and user control: users have full control over their data, including the ability to revoke access and manage their encryption keys.
To learn more, read our full privacy policy.
Start securing your sensitive data today
Enjoy a 15-day free trial — You can cancel anytime.